You can easily create a contact form in your blogger website. It is a necessary element for any blog as it helps your visitors to find you.
 |
| Blogger Contact Form |
With the need of Contact Us form you don't need to share your email ID and contact info with others. Further it makes the process much easier and time saving.
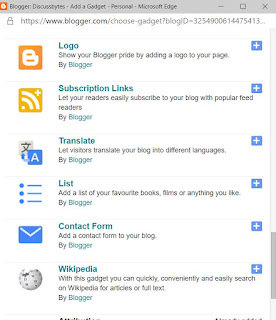
Method 1: You can use blogger inbuilt gadget to get a contact form.
- Go to blogger Dashboard.
- Under Layout, click on "Add a Gadget" option.
- Choose Contact Form gadget by blogger.
You are all set. You can place it anywhere in your blog.
Method 2: This method requires us to make a separate new page.
- Go to Pages
- Create a new page. Name it Contact Us.
- Change to HTML view.
- Paste the below code there:-
<div id="custom_ContactUsFromForBlogSpotBlogger" class="widget ContactForm">
<div class="contact-form-widget">
<p>Get in touch with us by filling out the form below.</p>
<div class="form">
<form name="contact-form">
<p></p>
Your Name *
<br>
<input type="text" value="" size="30" name="name" id="ContactForm1_contact-form-name" class="contact-form-name">
<p></p>
Your Email
<span style="font-weight: bolder;">*</span>
<br>
<input type="text" value="" size="30" name="email" id="ContactForm1_contact-form-email" class="contact-form-email">
<p></p>
Your Message
<span style="font-weight: bolder;">*</span>
<br>
<textarea rows="5" name="email-message" id="ContactForm1_contact-form-emailmessage" cols="25" class="contact-form-email-message"></textarea>
<p></p>
<input type="button" value="Send" id="ContactForm1_contact-form-submit" class="contact-form-button contact-form-button-submit">
<p></p>
<div style="text-align: center; max-width: 222px; width: 100%">
<p id="ContactForm1_contact-form-error-message" class="contact-form-error-message"></p>
<p id="ContactForm1_contact-form-success-message" class="contact-form-success-message"></p>
</div>
</form>
</div>
</div>
<div class="clear"></div>
<span class="widget-item-control">
<span class="item-control blog-admin">
<a title="Edit" target="configContactForm1" onclick="return _WidgetManager._PopupConfig(document.getElementById("ContactForm1"));" href="//www.blogger.com/rearrange?blogID=3254900614475413295&widgetType=ContactForm&widgetId=ContactForm1&action=editWidget§ionId=sidebar-right-1" class="quickedit">
<img width="18" height="18" src="//img1.blogblog.com/img/icon18_wrench_allbkg.png" alt="">
</a>
</span>
</span>
<div class="clear"></div>
</div>{codeBox}
- Here Name, Email and Message are necessary attributes. In the line where the blog ID is mentioned(in colour) replace it with your unique blog ID. You can find it from your blogger dashboard.
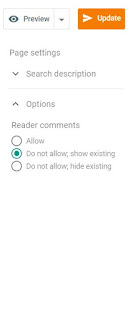
- Turn off the comments in the contact page. (Optional but recommended)
- Save the page and publish it. Add it from layout to your blog using Link List widget.
Congrats your contact form is now live. It would be look like this image.
You can also customize this form using HTML, CSS and JavaScript according to your wish.
Now you will receive email in your blog email ID when someone tries to contact you through this form.
Also Read: How to Get Started with Blogger Sitemap
Ending Notes
You can ask me in the comments section below if you encounter any problem. If this helps you, your appreciation would be appreciated. I would continue to add blogger tutorials for beginners in future.
Stay connected with us for latest tech updates.


Really helpful 👍
ReplyDeleteThanks for your appreciation.
ReplyDelete